
How to leave a Discord server on PC, Mac, and mobile

There’s nothing like the community feel of immersive gameplay as experienced through a Discord server. There may come a time though when you’ve decided you need to remove yourself from a specific server. Perhaps you’re not a fan of how players are treating each other. Or maybe you’re not playing that particular game anymore.

Difficulty

Easy

Duration

5 minutes

What You Need

Whatever the reason may be, removing yourself from a Discord server is pretty easy, and we’ve put together this step-by-step guide to help you along the way.

How to leave a Discord server on PC, Mac, or web

Discord can be accessed through the app or web version on your Windows or Mac computer. Here are the instructions to remove yourself from a server:

Step 1: Launch Discord (app or web) and log in to your account.

Step 2: Select the server you want to leave from the sidebar on the left.

Server list on Discord.
Digital Trends

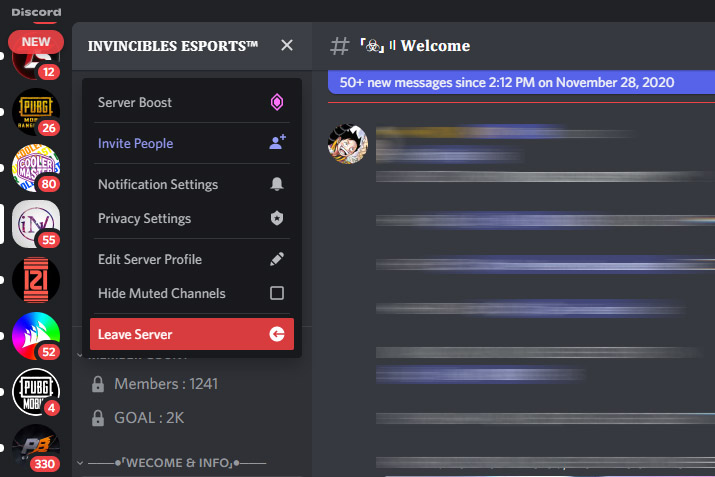
Step 3: Once the server page opens, select the server name at the top to reveal a drop-down menu and select Leave server.

Screenshot of server options on Discord.
Digital Trends

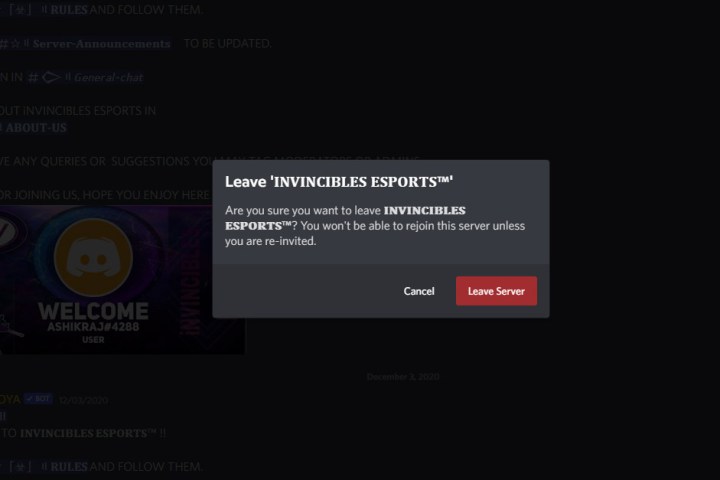
Step 4: A pop-up should appear confirming your action. Select Leave server once again to leave the server.

Screenshot of prompt asking to leave a server on Discord.
Digital Trends

How to leave a Discord server on mobile

The process to leave a server on Discord is the same on mobile. Here are the instructions to remove yourself from a server:

Step 1: Launch the Discord app on your smartphone and make sure you are logged in.

Step 2: Select the server you want to leave from the sidebar on the left.

Screenshot of how to leave a Discord server on mobile.
Digital Trends

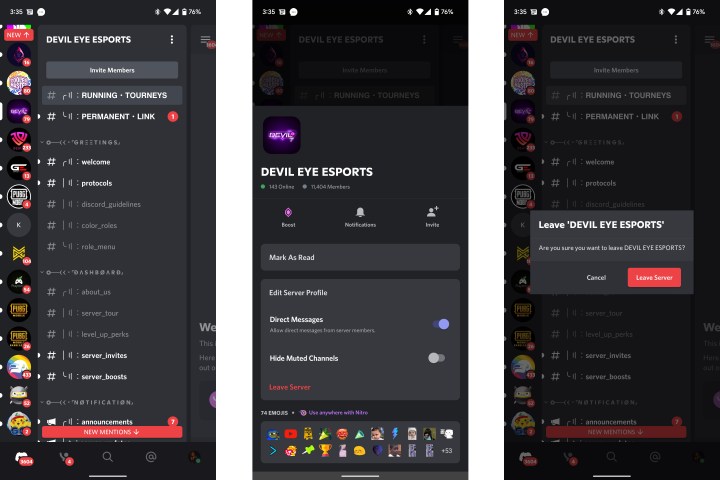
Step 3: Once the server page opens, tap the Three dots on the top, next to the name of the server, to open the server options.

Step 4: Select Leave server from the menu.

Step 5: Confirm the same by selecting Leave server once again from the prompt.

If you are new to Discord, make sure you check out our various guides, including how to report someone, how to use text to speech, or our comprehensive Discord guide.

Editors' Recommendations

Kunal Khullar
A PC hardware enthusiast and casual gamer, Kunal has been in the tech industry for almost a decade contributing to names like…
How to enable picture-in-picture for YouTube on your Mac
Macbook Air

If you want to have a bit of music playing in the background or want to have your favorite YouTube video running in the corner of your screen, then the picture-in-picture YouTube feature needs to be on your radar. This allows you to turn your YouTube videos into a tiny pop-up window that can be moved and repositioned around your screen.

Mac users have several ways to activate the feature, including support on both Safari and Google Chrome. There's also a nifty Chrome extension that simplifies the task to a single button press. Here's a look at how to enable picture-in-picture for YouTube on your Mac.

Read more
How to change your Zoom background on Mac and Windows
A man working from home.

Not everyone builds their home office around video calls. And if your home office also doubles as your bedroom, kitchen, or is tucked away in a cluttered corner of your basement, you'll be glad to know that Zoom lets you hide your surroundings from your co-workers. One way the software does this is by letting you change your Zoom background, allowing others in the chat to see you while swapping out your environment for something more professional.

Want to make use of the cool feature? In this guide, we'll go over how to change your Zoom background using both built-in images and custom images uploaded by the user. We also cover how to blur your Zoom background, in case you want something a bit more low-key, along with how to add filters for something more fun.
Step 1: Access your Zoom settings

Read more
How to insert footnotes in Word on PC and Mac
A person drinking coffee while using a laptop at a table.

When you're working on a text document and making sure to cite your sources, it's helpful to have a way to keep your footnotes organized and in order. And footnotes can be useful for functions beyond citations too, as a place to add extra notes or commentary which you want to keep as part of your document but without interrupting the flow of your main text.

For adding footnotes in a Word document, there's a special footnote function which will automatically format your footnotes and make them look neat and professional. It's one of those Microsoft Word tricks that's useful to have up your sleeve, so we'll show you how to add a footnote to a Word document in this guide.

Read more